Event planning
How to plan a 3 × 3 m exhibition stand
Plan an inviting stand with room for your message, your team and your visitors.
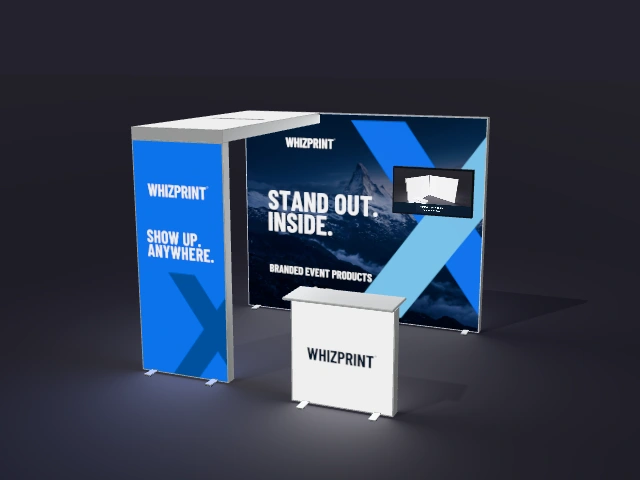
Illustrative preview; check the selected product configuration for included items.
Find out which sides are open
A corner pitch and a pitch with one open side need different layouts, even when both measure 3 × 3 m. Start with the organiser’s floor plan. Check the usable dimensions, height restrictions, power arrangements and what the venue already supplies. A booked floor area is not necessarily the same as the dimensions of its wall panels.
Decide what happens on the stand
Choose the main activity: a short conversation, a product demonstration or displaying samples. Give that activity enough space before adding furniture. Keep the entrance clear so people can step inside without squeezing between a counter and a display.
Give the main wall one clear message
Visitors should be able to understand what you offer while walking past. Use a prominent headline, your branding and an image that supports the message. Put detailed specifications in material people can read up close. Check whether a counter, shelf or screen obscures anything important.
Choose extras for a reason
A counter can provide a place to talk and put down materials. Shelving may help when visitors need to see physical samples. A TV holder can support a presentation, but the screen shown in the Whizprint preview is illustrative and is not supplied. Check the options and included components for your chosen kit rather than assuming every pictured item is included.
Check the layout from the visitor’s view
Explore the lightbox starting layouts in Studio, then personalise the panels and available extras. Rotate the preview to see the stand from its open sides. Use the venue plan alongside the preview when checking clearances: the design preview does not replace the organiser’s requirements or a measured installation plan.